FASHION: Summer Beach Look

Hi everyone! It's Adri of Adri's World here. A beach day is a favorite on these hot Summer days, so let's add some fun style!

Of course a great pair of sunglasses should be a part of everyone's beach bag and I personally love those aviators! A colorful patterned beach towel to match your stylish bikini and a pretty pink nail polish are perfect.  And, if we're going to be in the sun we cannot forget sunscreen and a hat to protect our skin. Oh, and let's not forget a fun and bright bag to take it all with us!

Are you ready for Summer beach days?


[1.ray-ban sunglasses, 2.madewell mara hoffman beach towel, 3.j.crew hat, 4.bop basics tote, 5.j.crew bikini, 6.deborah lippmann nail polish, 7.lancôme sunscreen]


- post by Adri Reynoso
Google+ Pinterest

Trend: Ripped Jeans

I remember wearing my first pair of ripped jeans back in 1990.  I felt SO freakin' cool and hip. 

Every musician on Mtv was wearing them, so, of course it was cool.  'Blue jeans' were invented by Jacob Davis & a company called Levi Strauss in 1873.  Believe it or not, they were originally designed for cowboys & miners - then out of nowhere.... greasers in the 1950's started wearing them.  And of course...BAM! .... a new trend was born.  Let's face it, denim is historic & no matter where you go in the world, someone is wearing jeans.

Ok, lets fast forward to 2014.... the popular ripped jean.  This is a trend that comes & goes and I admit, I'm all over it!  Especially in the HOT summer days, when you need some ventilation on those legs.  I HATE wearing tight skinny-jeans when it's boiling hot out,  I mean if I have to wear pants when it's hot.... this is the way to go.

Ripped jeans look great with just about anything & I tend to like the natural-looking tears as opposed to the store-bought rip or the b-a-d DIY job some people do!!  Know those jeans???  Below are a few ways to wear ripped jeans this Summer & of course in the Fall.


Simple guide to ripping your own pair of jeans. 


  • Best to start this project with jeans that you've already worn + a more distressed looking jean will give it an overall better look.  For example, stay away from dark washed jeans.
  • To start, you can rub sandpaper over the marked areas to make them appear more distressed or you can just go ahead & start the cutting. To cut, use super-sharp small scissors, an x-acto knife, or a box cutter.  Pick the areas you want the holes to appear in & mark them with a pen. I would stick to the knees and the tops of the quad area.  Also decide if you want massive holes, or gentle fraying. Stay away from butt tears....please.
  • With your cutting tools, cut horizontal slits where you made your pen marks. 
  • Start pulling on any horizontal thread that is white.
  • Go ahead & start removing some of the horizontal threads, and then make sure you can pull out all the blue vertical threads. So remember you're going to start with horizontal then vertical.
  • Throw them in the wash, the more they're washed, t he more natural looking the tears will look. Which is the way I prefer it!

-------------------------------------------------------------------------------------------------------------------------
images: top to bottom: sincerelyjules // dulceida // unknown // me // hawt celebs // unknown // john lamparski/getty images // songofstyle // any image above not credited & you know who it belongs to, I would love to know& credit it here.


-post by jen ramos


Google+ Pinterest

DESIGN: Trays

Hi there!  There are so many ways to style a coffee table using various accessories and decorative items from candles to sculptures to create a perfect combo! What I love are the super stylish coffee table trays, that can compete with the pretties accessories and complete or set the look.  Here are my favorite top 10 trays that I would love to use in my living room!!

Monika from ohmydeco.


Google+ Pinterest

Cargo Cosmetics & Made By Girl

CARGO COSMETICS just launched some new 'You Tube' videos using my Made By Girl artwork!  They loved my art so much, they contacted me wanting to feature it in their newest videos! Of course, I said YES.  So exciting to see the full gallery-wall in their how-to videos!  You can watch the videos below where they share how-to's on:

             I'm also working on a braid tutorial video with the Oscar Blandi team - stay tuned!!!


Google+ Pinterest

FASHION: HOW TO WEAR MIRRORED AVIATORS

Hello ladies, this is Sandra from Blasfemmes.  It’s Summer and I’m in love with mirrored sunglasses. Last year I got this pair and this year I’ve been flirting with the pair of mirrored sunglasses on this post (see below) for a while now. Mirrored sunglasses come in many shapes, sizes, colors and brands but my favorite model is Ray-ban's aviator, hands down. I was a little apprehensive before getting my first pair because I questioned their versatility but I figured they’re incredibly versatile.

I think everyone should get a pair for beach moves, work or just strolling around town. Do you like this kind of sunglasses?


 -post by sandra lopes


Google+ Pinterest

NESPRESSO Summer Iced Coffee

Nespresso is one of my favorite brands.

There's a cafe here on the upper East Side which I frequent during the summer days. It has been hot & humid the last few weeks & there is no doubt Summer is here.  Like many of you, I crave iced coffee.

However, there is nothing like coming home to your own machine.  This past weekend we tried  using our new VertuoLine machine (thanks to Nespresso), which is a single-cup coffee maker.  This machine is strictly a coffee + espresso maker with a sleek new design.  It pours your drink with Nespresso's signature crema layer, making your coffee look more gourmet!  So, again I repeat, this machine only makes coffee & espresso - so if that's your thing, then this is the machine for you.

Here's the Summer drink we made with the VertuoLine - which also makes for a great entertaining iced coffee:


DIRECTIONS:
  • Prepare a full sized cup of Nespresso Vertuoline coffee to your taste.
  • Add sweetener to taste (agave works great for this).
  • Chill with ice until very cold - a shaker works best for this, or alternatively chill it for 30 minutes in the refrigerator.
  • Put into glass with new ice.
  • Slowly pour 2 tablespoons very cold heavy cream over the top, mix & enjoy.


This brewer does not have a frother, so if you'd like to make this drink above, you'll have to buy the frother & brewer package here.  Also, please check out the cute Nespresso video we made on my instagram.


-images by jen ramos


Google+ Pinterest

DESIGN: Bathroom Tiles

Hi lovelies, Monika here from ohmydeco! I am currently obsessed with beautiful decorative bathroom tiles, you surely did see them all over pinterest! My favourite are the honeycomb shaped and geometric patterns paired with shiny accessories and wood. My future bathroom with definitely look a lot like those below!!


Pictures from the top left: 1 via pinterest // 2 via pinterest // 3 via Chicdeco // 4 via pinterest

// 6 Cabinet via Houzz // 7 ABC Home Rug // 8 ABC Home Towels //


-post by monika boruch

 
Google+ Pinterest

DESIGN: Pops Of Color

Hi everyone, its Lisa with Gem Daily-here with another decor post! When it comes to furnishing your home, I am a firm believer in investing in the larger pieces that will stand the test of time, i.e sofas, beds  & dining tables. They key to these pieces is to keep them simple and classic. That way, you can refresh your space seasonally with smaller accents, like bedding, table lamps & tabletop accessories. So why not, select smaller accents that add a pop of color? They are the easiest way to keep your space fun and exciting! Here are just a few I am coveting at the moment!


via houzz


hunted interior via home depot


seven// picture frame
eight// shop hdb


-post by lisa fisbeck

Google+ Pinterest

SERIES: Let's Get This Look

This is a series called, "Let's Get This Look" - where we put together a SIMILAR wardrobe to help you "get that look" based on what others are wearing.  It's that simple.  If you missed the previous post, here it is.


model image via metro // black crop top via
alice & olivia //skirt by clover canyon //skirt via juan vidal // tank crop top from river island // lucite clutch via lushfox // ray ban // skirt by joa // high heel pumps manolo blahnik


Google+ Pinterest

BEAUTY: SUMMER BEAUTY

With summer in full swing, it's time to roll out the seasonal beauty products. Summer brings warmer weather and a full social calendar, which means we all want to look our best. But beating the frizzy hair and raccoon eyes become quite the challenge in the heat. Here are a few of my picks for summer hair and beauty- what are yours? 


Vita Liberata Rapid Tan Mousse- Tan the safe way this summer and get a realistic, bronzy glow with the help of this product.  This mousse works in as little as one hour and continues to develop, allowing you to choose your desired depth of tan that lasts for four to seven days. The bottle promises zero smell, so there's no worries about your faux tan being any less of a secret.

Formula X Electrics Nail Polish- This summer orange shade ("Oomph") looks great on either nails or toes- or both! This vivid shade goes on smoothly and evenly and resists chipping.

Alterna Caviar Anti-Aging® Replenishing Moisture Milk- Summer can take a toll on your hair- UV rays, chlorine and a few skipped days of brushing (oops) are all common culprits. This leave-in conditioner works to hydrate deeply to treat dry, brittle, or aging hair. Your hair will feel silky smooth after just one application.

Fresh Sugar Lip Treatment SPF 15- Finding a pretty lip balm that contains SPF can be hard, but this one does the job. Choose from a variety of shades- I love the coral tinted version- for just a touch of color.  Vitamins A, C, and E provide protection from wrinkles and UV rays.

Benefit Cosmetics BADgal Waterproof Mascara- There's nothing worse that messy mascara that melts in the heat. This Benefit classic is reinvented in a waterproof version to stop just that. The dark black color adds thickness to each and every lash.


-post by rachel maleady


Google+ Pinterest

Our Royal Caribbean Cruise Vacation

I've always been wary of cruises.

The idea of being out in the middle of the ocean PETRIFIED me.  However, when Royal Caribbean said they would sponsor a trip to Cozumel, Mexico, I stopped to re-think.  I figured if thousands of people sail each day, why not me? To play it safe, we agreed to only do (4) nights instead of seven, just in case we didn't enjoy it.

So I told my husband all the details & before you know it, we were off to Ft. Lauderdale where we boarded the Vision Of The Seas ship. This is a relatively BIG ship, so we were excited!

This is the 1st photo I shot of the ship as we walked toward the check-in area.  It was like a dream come true seeing the actual ship in person,  it was MASSIVE.  When we boarded, they directed us to our balcony stateroom - Oui, monsieur...... which was toward the front of the ship on the 7th floor.   A balcony room is the way to go – the view is breathtaking all hours of the day....if you don't get a balcony, most rooms will tend to have a tiny porthole, or no windows at all.  I'm claustrophobic, so that doesn't fly with me! NO WAY.

As the ship took off, the land seemed to get smaller & more distant; it was very surreal, since I'd never been in the middle of the ocean with water surrounding me on all 4 sides.  It was a lovely cruise with lots of food, entertainment, and plenty of interesting activities to get involved in or watch. We sat down for a FREE comedy show one night and that was really fun.  Most of the cruise was spent either sunbathing, or just relaxing in our room.  There are 3 meals a day served, either to your room or in the main dining area + 1 housekeeper for each room, so your room is always clean.....keep reading below....


When we finally got into our state room, they had this beautiful fruit salad waiting for us - and look at our prvate balcony, so beautiful and serene.


I immediately took a shower & put on my robe - loved the cute little bathroom. All stocked up like any luxury hotel, with fancy shampoos, conditioners & lotions!  It was a small bathroom with a shower, but still very comfortable with lots of shelf space for our toiletries. That was a plus since I tend to travel with lots of toiletries. My husband always asks "do you need all that?" - My response, "Ummmmmmm, yeaaa"

We spent the Fourth of July on the ship, and even though we didn't see fireworks, there were plenty of events.  After a delicious formal dinner there was a beautiful red, white & blue balloon drop in the atrium, super cute!  The sunset was amazing that night too. In case you shoe-addicts are wondering, my shoes are from ShoeMint & my dress is from Mango.


The next day was gorgeous, blue skies all around us......if felt as if the sky never ended. God's presence was certainly bountiful.


Because it was so windy, I ended up having to braid my hair.  I used this really cool product by Oscar Blandi called 'Braid Paste', which helps keep braids neat.


This was the main dining hall, with a ton of huge round windows running on each side of the ship....and lots of amazing views. We also had a chance to try out the three specialty restaurants (check out my Instagram for lots of pics) - I really liked the ambiance at the Asian spot, Izumi, but Mat was especially fond of the steakhouse, Chops Grille (thanks to Franz, the Hotel Director, for the recommendations). They even had lots of gluten-free and dairy-free options....perfect for me.


Thanks to Triangl Swimwear for these amazing neoprene swimsuits.  LOVE them!


Good morning! This was probably one of the most AMAZING breakfasts we've ever had....because of the beautiful view.  Don't you agree?


We stopped to enjoy Cozumel, Mexico for the day - It was beautiful & probably the hottest place I've been in a long time. The humidity was SO thick - so when we arrived back to NYC humidity, we weren't complaining.


The sunsets were also a favorite of ours, it was very romantic and unlike any other sunset.


After that experience, you can bet we will be taking another cruise again! And definitely the experience aboard Royal Caribbean was really top-notch...the crew was so friendly & helpful, and there's so many choices of ships, locations and activities. Best of all, there's something for everyone to do – eat, spa, sunbathe, swim, exercise, sight-see, gamble, or just relax – and no shortage of it. Thank you RC.


-images by jen ramos
-the trip was sponsored by Royal Caribbean
- Want tips on how to save on a cruise?  - visit this blog:


Google+ Pinterest

FOOD: NEW ORLEANS-STYLE BARBECUED SHRIMP

Hey everyone! Jen from Lemon Drop Love here. Today I'm sharing a recipe we have been making a lot over at my house. This barbecued shrimp dish is very traditional to New Orleans style cooking, and it just so happens to be perfect for this time of year. The title of this dish is a little deceiving since you don't use a grill nor do you douse the shrimp in a tangy sauce. But you do cook them in the oven with spices, butter and olive oil---it's a cinch. The shrimp come out of the oven perfect and full of flavor and spice.

Since the shrimp are cooked with the shell on, plan to use a bunch of napkins---and know the mess is so worth it. Pair this dish with fresh French bread to help sop up all the sauce. Get ready to dig in and get messy!


New Orleans-style Barbecued Shrimp


INGREDIENTS:
4 oz unsalted butter
1/2 cup olive oil
1 yellow onion, finely chopped
2 tablespoons dried rosemary
1 tablespoon dried oregano
1 large clove garlic, minced
1/2 cup minced fresh flat-leaf (Italian) parsley
Sea salt and freshly ground black pepper
Cayenne pepper
2 lbs extra large shrimp
Warmed French bread for serving


DIRECTIONS: (recipe adapted via Williams-Sonoma, New Orleans, authentic recipes celebrating the foods of the world)
  • Step 1: Preheat oven to 350 F. In a large frying pan over medium heat, melt butter with olive oil. Add the onion, rosemary, and oregano and cook until the onion is translucent but not browned, about 8 minutes. Add the garlic and cook until the garlic is softened, about 2 minutes longer. Stir in the parsley and remove from the heat. Season well with salt, black pepper, and cayenne.
  • Step 2: Rinse the shrimp and arrange them in a shallow baking dish. Pour the warm sauce over the top. Bake uncovered, stirring every 10 minutes, until the shrimp are opaque throughout and the flavors have melded, about 30 minutes.
  • Step 3: Divide the shrimp and sauce among shallow bowls. Serve at once with French bread. 


-post and images by jen costea


Google+ Pinterest

Invite: Love Your Life Event

Hey ladies! If you all recall, last year I spoke at the Love Your Life event, which you can see the post + video here.  What a pleasure it was to tell my story & be able to inspire other women. These events happen here in NYC every so often & I'd like to invite you to the next one.  I won't be the guest speaker this time, but I will be attending.


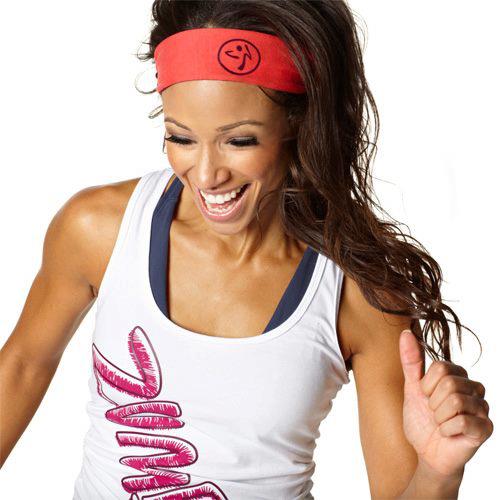
<U>Loretta Bates</u>Join Lynette Lewis + special guest world-renowned, certified Zumba instructor Loretta Bates here in New York City on Tues. July 15th for the first salon event that will bring several women together in a cozy loft space in midtown. This will be an evening of light refreshments + hors d'oeuvres, relationship-building & practical application toward advancing our dreams. Lynette will have an up-close-and-personal interview during this special salon event will provide insights and practical solutions to ignite motivation and help launch YOU to your next level, no matter your field or where you are on the path to pursuing your dream.  


During this salon event you will:
  • Listen to relatable stories and lessons that affirm your own journey and inspire you to break through barriers
  • Meet other like-minded women who can offer connections, ideas, and accountability for actually doing your biggest dreams
  • Become even more motivated and inspired that you CAN live your dreams and live them NOW
  • Make new friends and find a sense of belonging and comaraderie giving life in the big city new meaning and fulfillment

lynette lewis love your life  


The stories of how past events have helped launch many women into their dreams are truly amazing.  From one woman winning a national election to others making connections for jobs, support, and deeper fulfillment, the Love Your Life vision is alive & well and is ready for YOU! 
 
Loretta and Lynette are looking forward to seeing you & getting this opportunity to connect and collaborate. Refreshments & hors d'oeuvres are served at 6:00pm, the interview starts promptly at 6:30pm and space is very limited so reserve your spot by registering here today.  


You can also check out Lynette's personal invite here on you tube.


Google+ Pinterest

MY MORNING BEAUTY ROUTINE

This is a series called -  "Morning BEAUTY Routine" - it's all about what YOU put on your face every morning.  I, (Jen Ramos) featured myself in the first one, which you can read here.  So...today we are featuring one of my contributors, Adri from Adri's World.  This is a great way to learn about beauty products others are using & what they think of them

Hi everyone this is Adri of Adri's World.  Today I'm excited to show you my daily morning beauty routine. I have combination skin and throughout the years I've been experimenting with different products but came to the conclusion (at least for me), that it's not about price but finding the best products that fit you. I used to buy all products from one same brand and slowly started to mix. These products I use now work great for me but, at the end of the day, the best thing for my skin has been my diet. When I eat well my skin looks amazing and when I don't, not so much...
Take a look at the products I've been using, and tell me if you use any of them!


Here's what I use:


DR. BRANDT SKINCARE XTEND YOUR YOUTH DUAL FUSION WATER: 
I love this cleanser! It leaves my skin super clean, tight, yet not dry at all. It's a cleanser, toner & makeup remover all-in-one. It even removes waterproof eye makeup with ease! It's made with no Parabens, sulfates & phthalates, which makes it even better!


OLAY TOTAL EFFECTS 7-IN-1 EYE CREAM:                                                                             
I tried this cream by accident. I ran out my favorite eye cream, rushed to the drugstore and thought I'd give this one a try. Years later I'm still using it, and love it! It's a very thick cream, hydrates really well. It's firming, treats dark circles, crow's feet and it's anti-aging, which is always necessary.

OLAY REGENERIST DEEP HYDRATION REGENERATING CREAM: 
What I love about this moisturizer is the heavy texture. It really moisturizes my skin without being oily. It has amino peptides, Vitamin E, ProVitamin B5, green tea, and non-greasy moisturizers. It keeps my skin really hydrated even in the cold winter days.
 
CHRISTOPHER DRUMMOND BEAUTY REVITALIZING FACIAL SERUM:
This serum has been a wonderful addition to my routine. I love how my skin has improved since I began using it about a year ago. It's hydrating, firming and smoothing and it contains organic ingredients, it's all natural, free of toxins and vegan. I use it before my moisturizer and sunscreen and it leaves my skin really soft and smooth. I'm a big fan!
 
MURAD BACKHEAD AND PORE CLERING DUO:
I recently began using these products and they are amazing! I use them once a week and I've noticed a big difference in my skin. First you use the clay and leave in on for 10 minutes, rinse and apply the pore sealer. Easy! They tighten my pores and I've seen a big improvement in the quality of my skin too, feels like a facial. They're made with no Parabens, Sulfates and Phthalates. I will definitely continue to use them!

- post by Adri Reynoso

Google+ Pinterest

FOOD: Smores CUPCAKES

Hi Made By Girl readers, Amanda here from A Life Well Lived.  Now that Summer is official upon us, I am so excited for all things summer - long days, BBQs and my personal favorite, camping. And of course, no camping is complete without making s'mores. Ooey gooey chocolately s'mores are the stuff that summer is made of in my opinion.


I love the flavor combination of s'mores soo much, that I decided to try them out in cupcake form; graham cracker bottom, chocolate cupcake batter topped with a toasted meringue. Heaven.  This cupcake is the next best thing to sitting by the fire making your very own s'more with the bonus that these can be enjoyed all year long from the comfort of your own home. Campfire is always encouraged but entirely optional.


 S'mores Cupcakes: (Cupcake recipe adapted from Ina Garten's Chocolate Cupcakes)

1 1/2 cups graham cracker crumbs (from about 20 squares)
5 tablespoons unsalted butter, melted
12 tablespoons (1 1/2 sticks) unsalted butter, at room temperature
2/3 cup granulated sugar
2/3 cup light brown sugar, packed
2 extra-large eggs, at room temperature
2 teaspoons pure vanilla extract
1 cup buttermilk, shaken, at room temperature
1/2 cup sour cream, at room temperature
2 tablespoons brewed coffee
1 3/4 cups all-purpose flour
1 cup good cocoa powder
1 1/2 teaspoons baking soda
1/2 teaspoon kosher salt 6 egg whites
1 1/2 cups sugar
1/2 teaspoon cream of tartar
1 1/2 teaspoons vanilla extract


Preheat the oven to 350 degrees F. Line cupcake pans with paper liners. In a food processor, pulse graham crackers until finely ground up. Add melted butter and pulse to combine. Place about 1 tablespoon graham cracker mixture in the bottom of the cupcake liners and press to evenly coat the bottom. Bake in oven for about 4 - 5 minutes until golden brown. Let cool while you make the cupcake batter. In the bowl of an electric mixer fitted with a paddle attachment, cream the butter and 2 sugars on high speed until light and fluffy, approximately 5 minutes. Lower the speed to medium, add the eggs 1 at a time, then add the vanilla and mix well. In a separate bowl, whisk together the buttermilk, sour cream, and esspresso.

In another bowl, sift together the flour, cocoa, baking soda, and salt. On low speed, add the buttermilk mixture and the flour mixture alternately in thirds to the mixer bowl, beginning with the buttermilk mixture and ending with the flour mixture. Mix only until blended. Fold the batter with a rubber spatula to be sure it's completely blended. Divide the batter among the cupcake pans. Bake for 20 to 25 minutes or until a toothpick comes out clean. Cool for 10 minutes, remove from the pans then allow to cool completely before frosting.


Make the frosting by combing egg whites, sugar, vanilla and cream of tartar in the bowl of a stand mixer.  Using an oven mitt, place bowl over a stove burner. Turn onto medium heat and whisk egg mixture over medium heat until egg whites are hot, about 4 minutes. Remove from stove  top and place on stand mixture. With a whisk attachment whip egg mixture until it becomes white and fluffy and stiff peaks are formed, about 5 -6 minutes. Place frosting into piping bag fitted with tip of choice  (I actually just cut off the tip of the bag and did not use a tip - but up to you!) Pipe frosting onto cupcakes in desired shape. Toast the frosting using a kitchen torch then sprinkle with crushed graham crackers.


-post by amanda frederickson


Google+ Pinterest
Related Posts Plugin for WordPress, Blogger...